GlobalEdge
Contents
GLOBALEDGE INTEGRATION
Connecting RFV to Global Edge
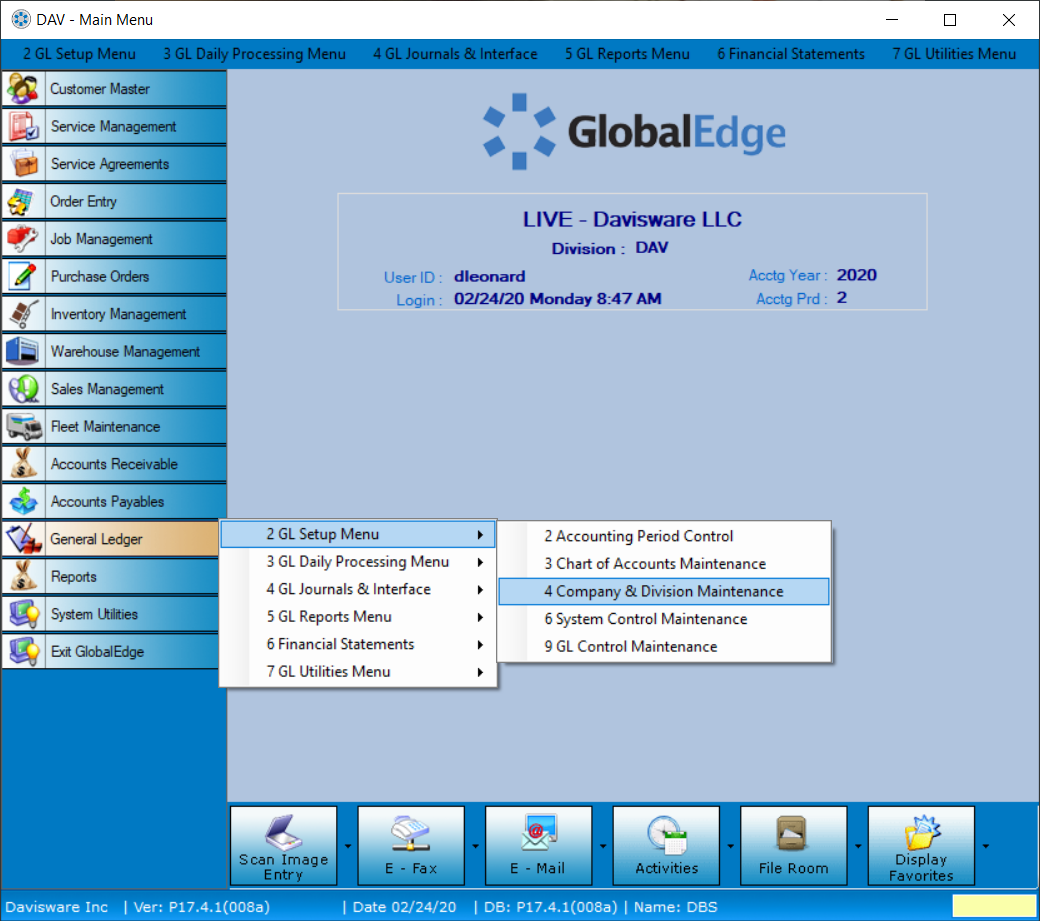
Login to Global Edge and navigate to General Ledger -> GL Setup Menu -> Company Division Maintenance.
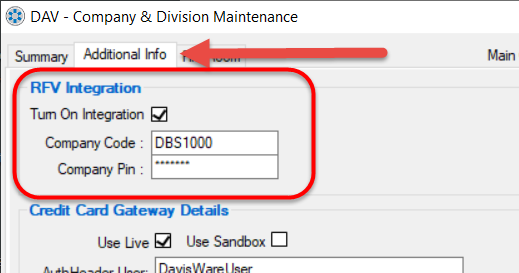
Once there, please click on the Additional Info tab and then click Edit. Fill out the three fields inside the red box:
Turn on Integration – Checked to allow communication to the RFV Program.
Company Code – Provided by your trainer.
Company Pin – Also provided by your trainer.
Click OK and continue to the next steps. Creating your Vehicles and your Vehicle Drivers.
Creating Vehicles in Global Edge
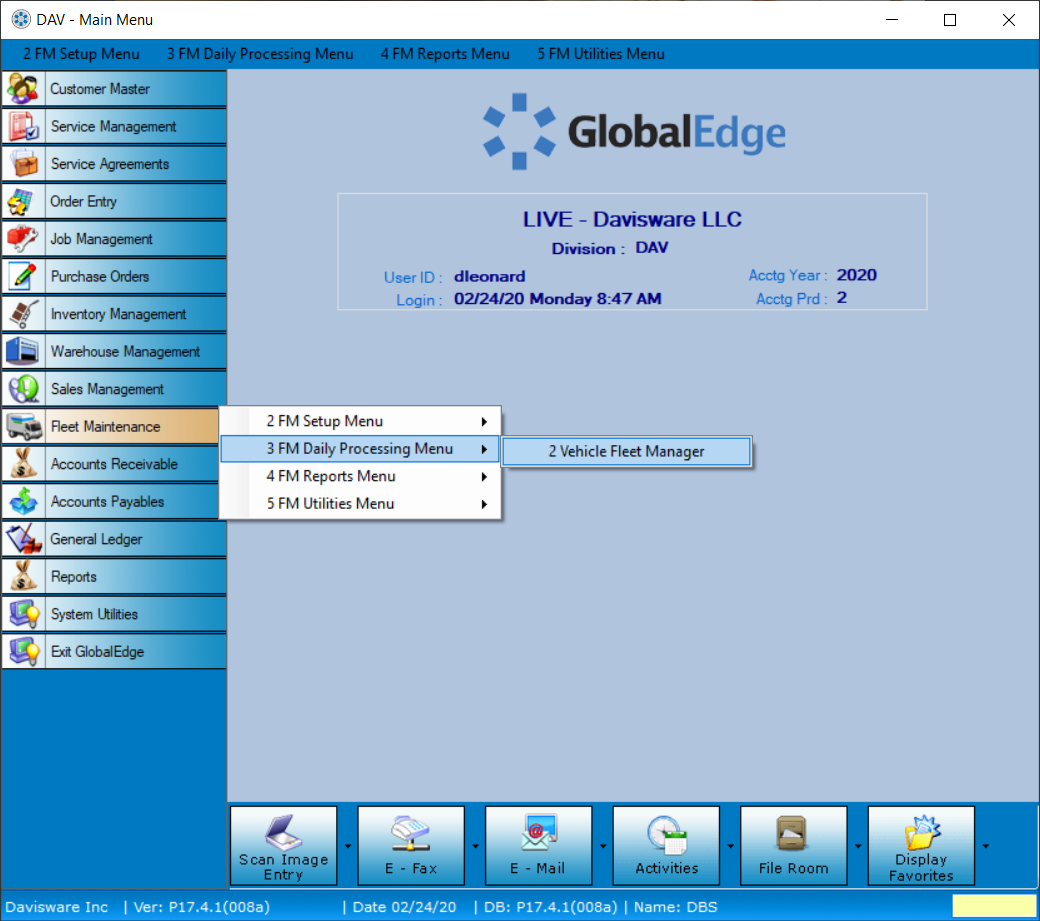
Navigate to Fleet Maintenance -> FM Setup Menu -> Vehicle Fleet Manager:
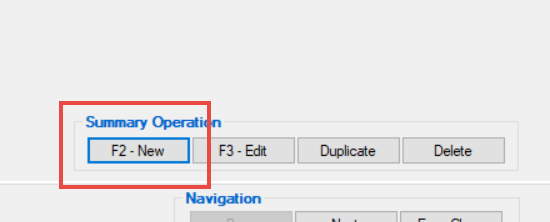
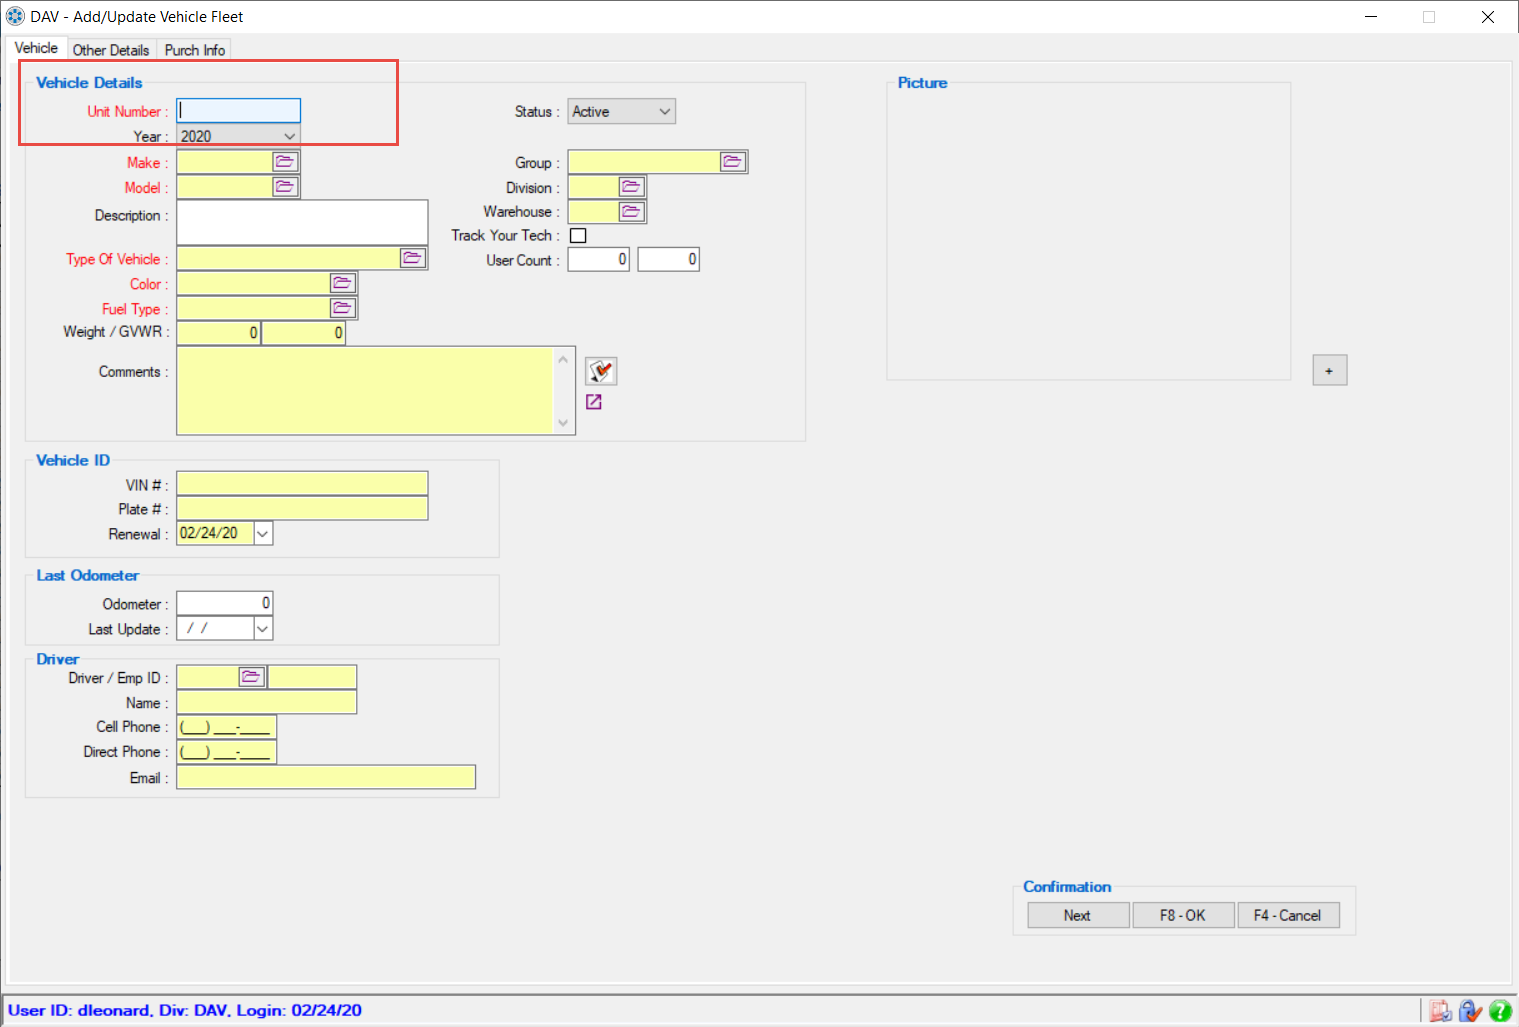
On the Vehicle Fleet Manager screen you will need to click on NEW (F2) to create a new vehicle.
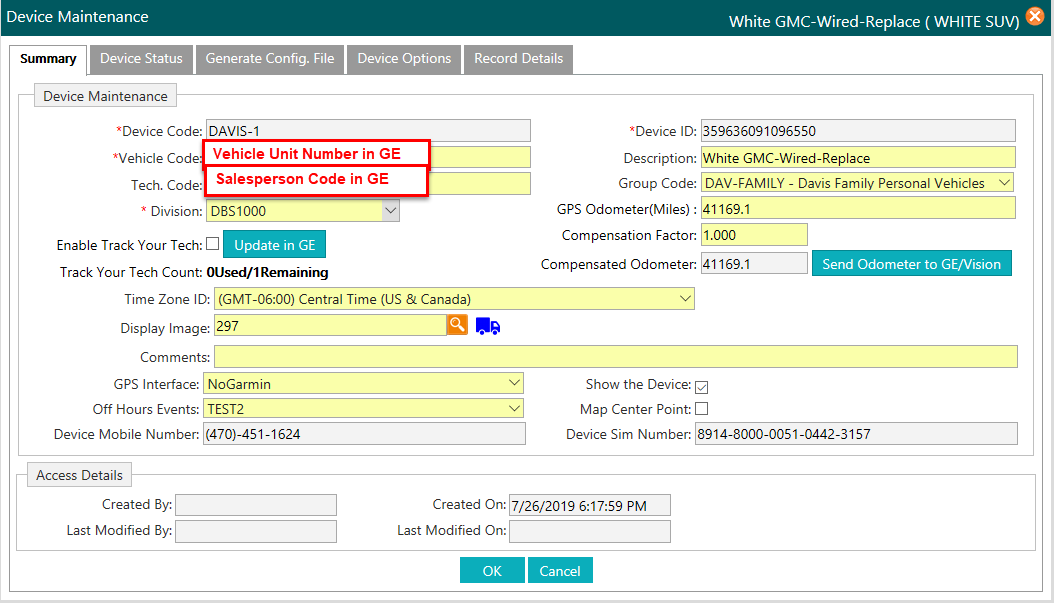
The main thing to remember when setting up your Vehicles is the UNIT NUMBER. The Unit Number MUST match your Vehicle Code in RFV, located under Administration Menu -> Device Maintenance. If this name does not match, there will be an issue in communication.
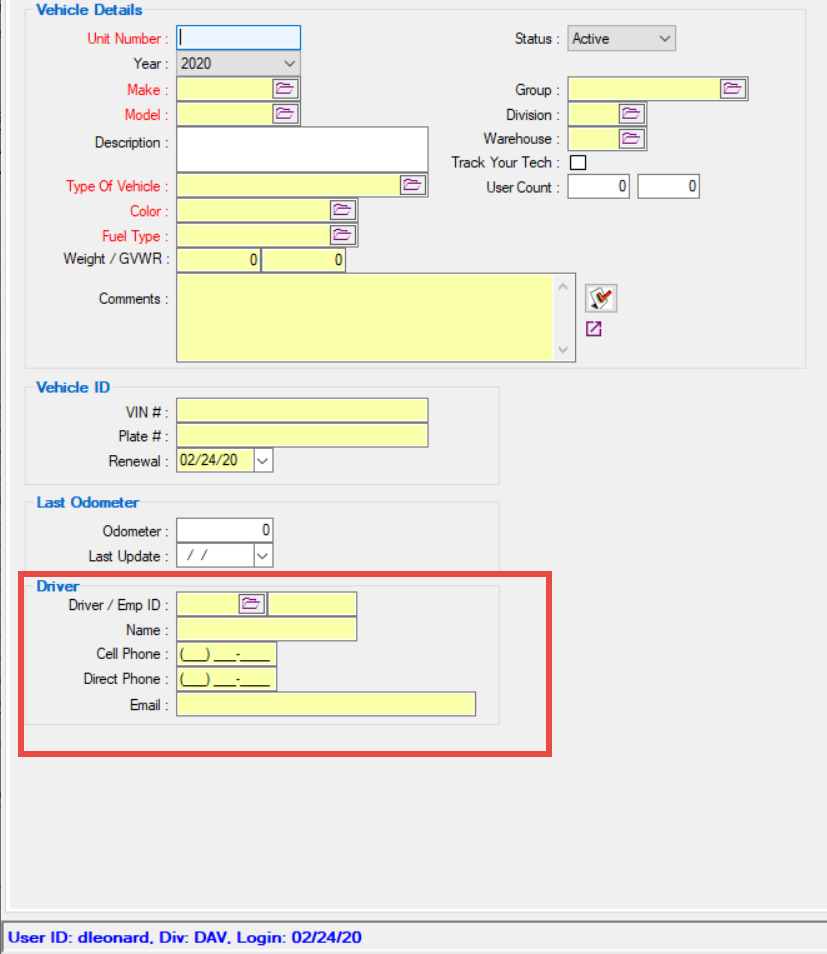
The rest of the information can be filled out with exception of the Driver Area. This cannot be filled yet until we create the Salesman entry. This will be created in the next section. We will return to this screen after the creation of the Salesman.
Now, let’s create our Salesperson.
Creating your Salesperson
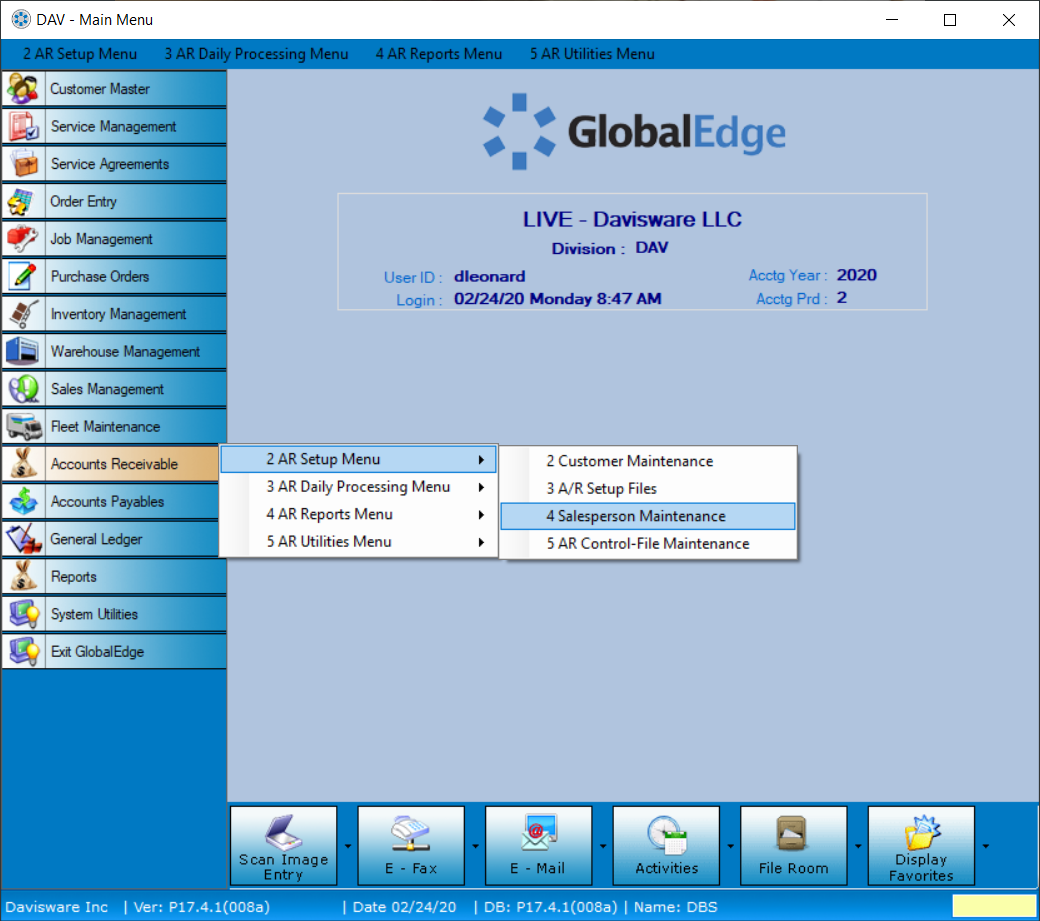
Navigate to Accounts Receivable -> AR Setup Menu -> Salesperson Maintenance:
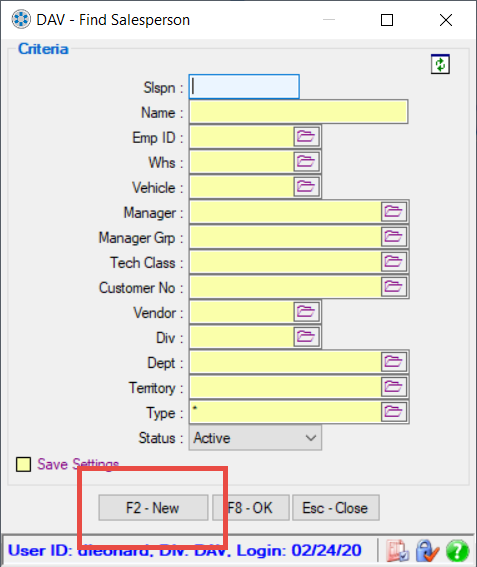
Click on F2 – New to create new entry. For the RFV(GOF) portion of this tutorial, the highlighted fields are needed.
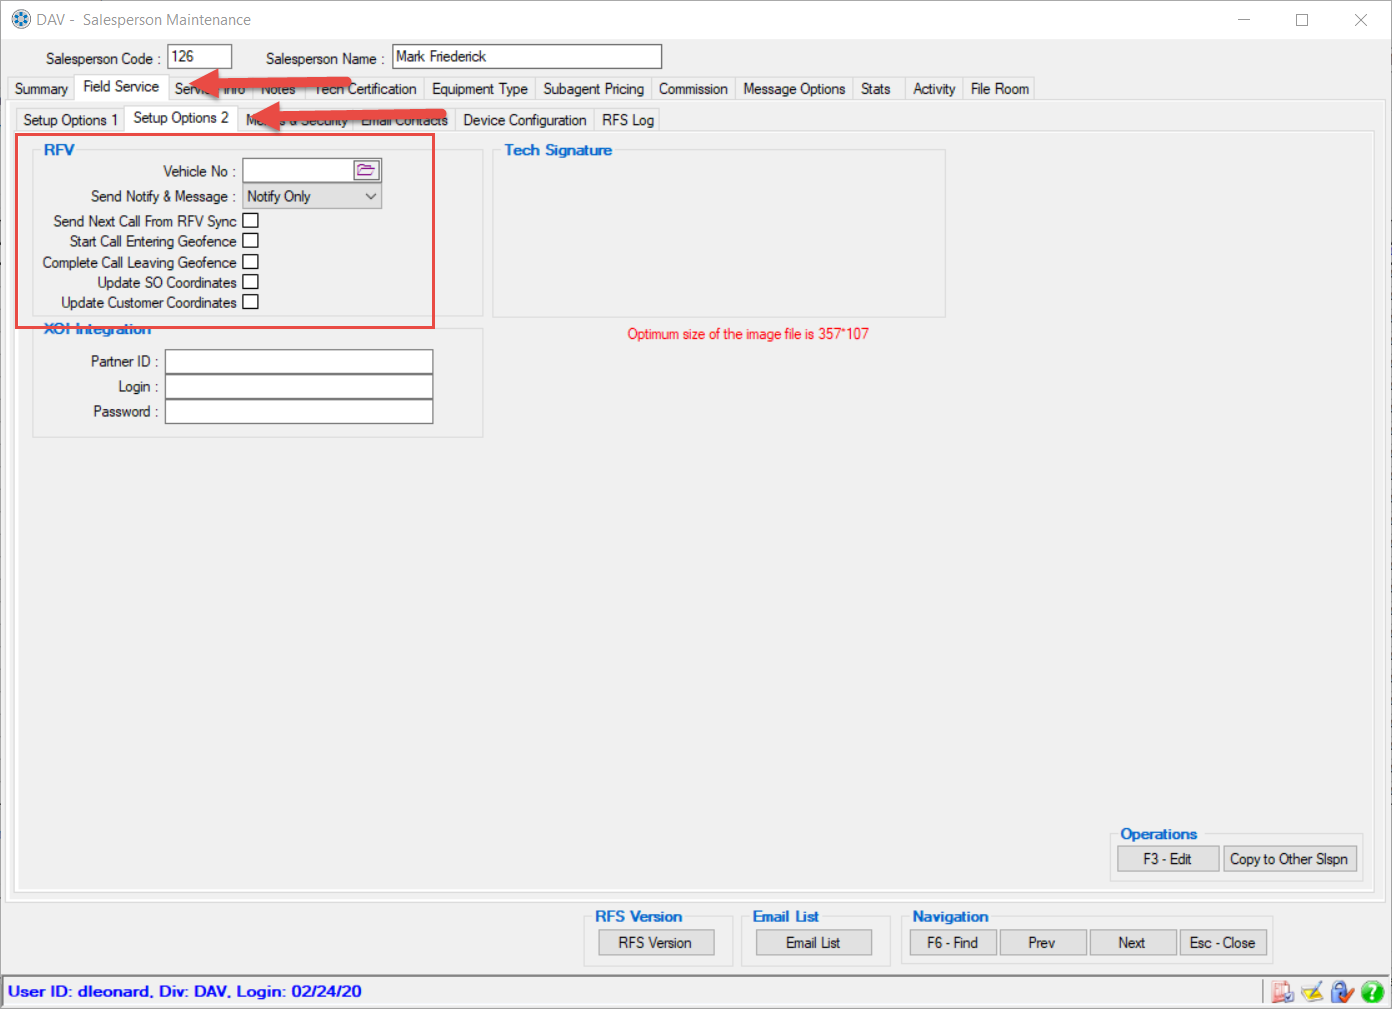
Next, click on the FIELD SERVICE Tab and then, Setup Options 2. Now look for the RFV section.
Vehicle No.- Will allow you to select from the vehicles that you created in the previous step.
Send Notify & Message – Sends the Service Order to the Garmin Device and also to the e-mail listed for the Sales Person.
Send Next Call from GOF Sync – Sends the next call on the Dboard automatically after the technician completes the first call.
Start Call Entering Geofence – This option is available after you have geo-coded all your customers. You can set the GPS unit to automatically change the status of a call to Started when the geofence is entered.
Complete Call Leaving Geofence – This option is available after you have geo-coded all your customers. You can set the GPS unit to automatically change the status of a call to Completed when the tech leaves the geofence.
Update SO Coordinates – Allows the technicians to change the geo-code of the Service Order to a more exact coordinates. Preferably where they parked for better accuracy.
Update Customer Coordinates – Allows the technicians to change the geo-code of the Customer to a more exact coordinates.
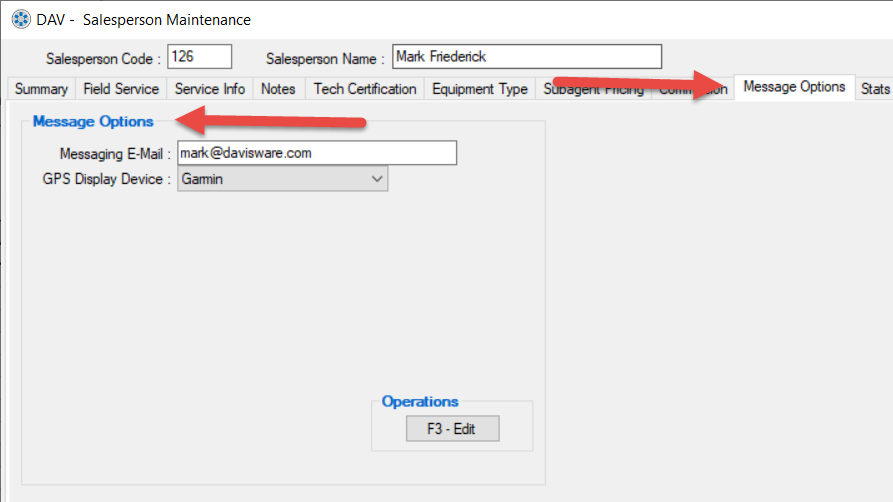
The next step is to click on the MESSAGE OPTIONS tab and setting up the following information:
Messaging E-Mail- Is the email address used to send the Service Order calls to the technician.
GPS Display Device – Set to Garmin if you have the Garmin interface.
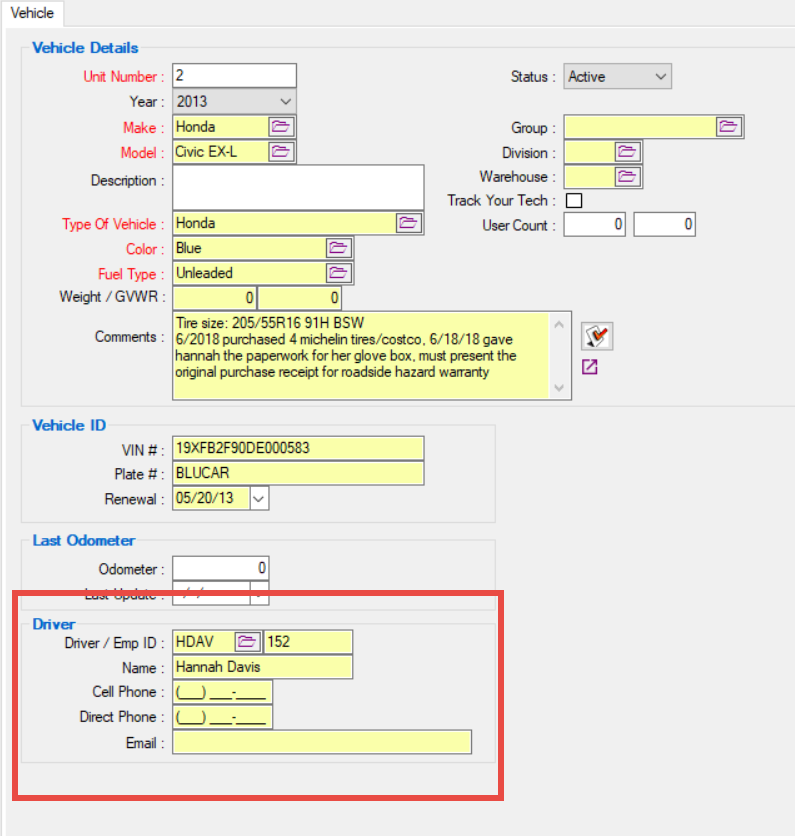
Now we can finish our setup in Fleet Vehicle Manager to add our driver.
Select your Vehicle and click EDIT.
Click the Folder Icon from the Driver/Emp ID field and select the salesperson who will be driving the vehicle.
Click OK. You have completed the set up in Global Edge.
Please login to https://rfv.davisware.com to continue.
Assigning the GPS Device to Technician
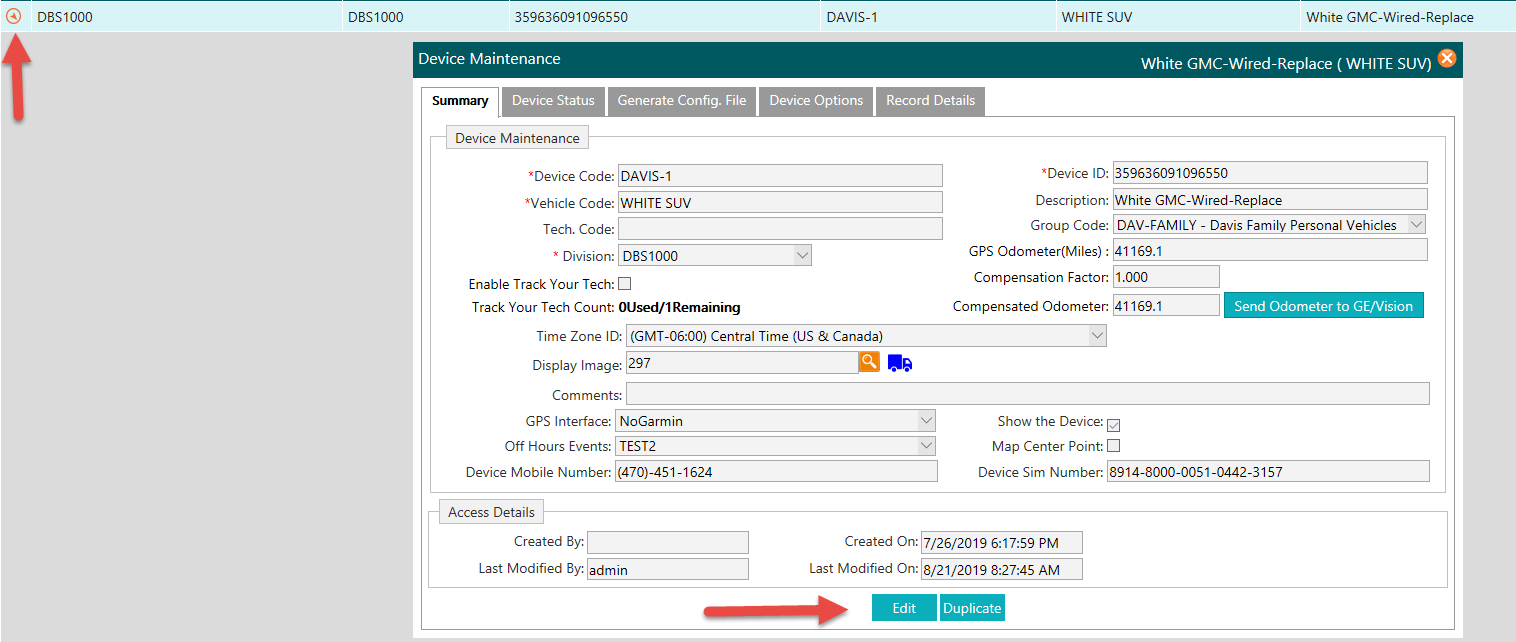
In RemoteField View, navigate to ADMINISTRATION/DEVICE MAINTENANCE. Find the first device to edit and expand the device’s properties and click EDIT.
Under the field called VEHICLE CODE. Enter the Global Edge (GE) Vehicle Unit Number to complete the integration. Click OK. You may also add the Salesperson Code if you wish. Not required, but if it helps you organize better, you may enter it here.
Repeat the steps for the remaining vehicles.
