Vision
Contents
Vision INTEGRATION
Connecting RFV to Vision Data
Davisware will handle this setup, but we will explain how this is linked.
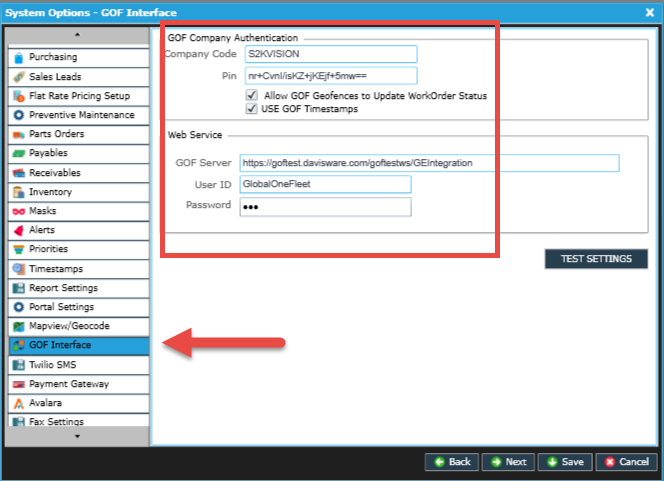
Below is the RFV Interface (GOF Module) under System Options. It consists of 5 fields:
Company Code – This is your company code. We will authenticate your vehicles by using this code.
Pin – This is an encrypted Pin to link your company to our RFV server.
RFV Server ‐ This is the web address where your Vision Data will be sent to. This is our RFV Server.
User ID and Password – Login for RFV Server
If this information is not filled in, there is no successful connection to RFV from Vision. Please contact Vision Support for assistance with this setup.
Setting up Vision Vehicles - MANUFACTURERS
The first step to follow is to set up your vehicles in Vision under Vehicle Maintenance.
Your vehicles will be tied to a GPS unit and also linked to the technicians so the system knows where to send Service Orders.
First, we suggest you create a list of all your vehicles and their designated drivers so it is easier to look at your fleet. Note the Make, Model and Year of the vehicles.
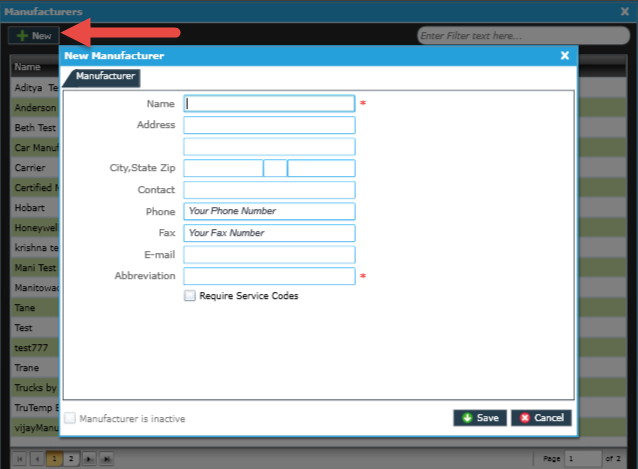
Now, we will create a Vehicle Manufacturer.
This is done by going into Setup > Equipment > Manufacturers. You do not need to enter all the information. Name and Abbreviation should be sufficient.
You will be shown a NOTES Screen, you can click Finish to enter the manufacturer. Repeat this step for the other Manufacturers.
Setting up Vision Vehicles - VEHICLES
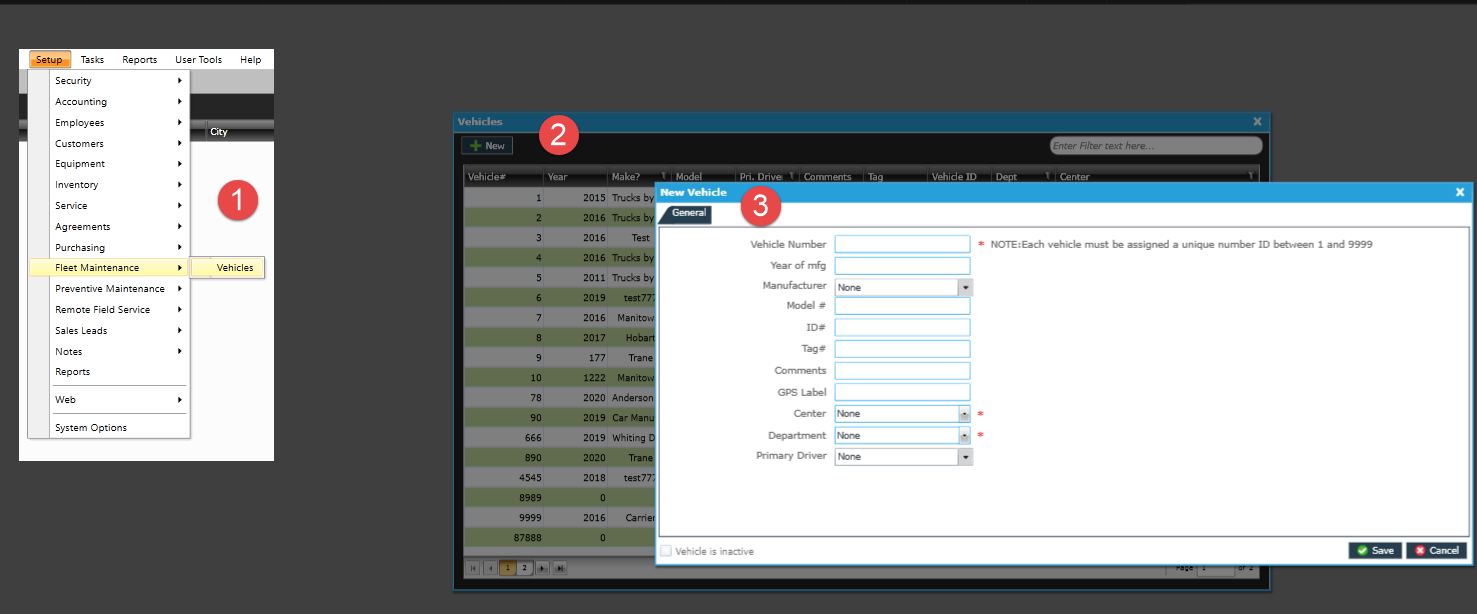
After you create your Manufacturers, it is time to create your vehicles. This is done by going into Setup > Fleet Maintenance > Vehicles. Click on NEW:
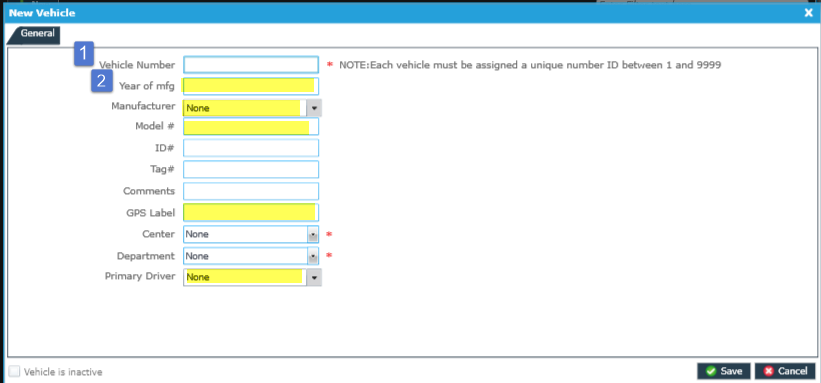
When creating new vehicles, please fill in the recommended fields below:
1. Assign a Vehicle Number - This can be your vehicle numbers or a sequential number.
2. Vehicle Information – Fill in the Highlighted fields.
- The Year of the vehicle.
- Manufacturer can be found by Clicking the “…” Button and searching for the Manufacturer you just created in the previous step.
- Model of the Vehicle.
- GPS LABEL Is VERY Important. This is how the Vehicle will be assigned to the GPS unit. In RFV, the Vehicle Code must match your GPS Label in Vision.
- Department will add the vehicle to a department of your choice.
- Primary Driver is another important field. This will link the employee to the vehicle. You will select your technician’s code to link the Driver to the vehicle. You can browse your technicians in RFV.
After all this is done, please click FINISH.
NOTE – We highly recommend that on your list of vehicles, you write down the Vision EMPLOYEE NUMBER as it will be used in later steps.
Now, repeat this process for your other vehicles.
Setting up Vision Vehicles – EMPLOYEE LINK
Now that you have created the Manufacturers and the Vehicles, it’s time to link the Employees to the correct Vehicles.
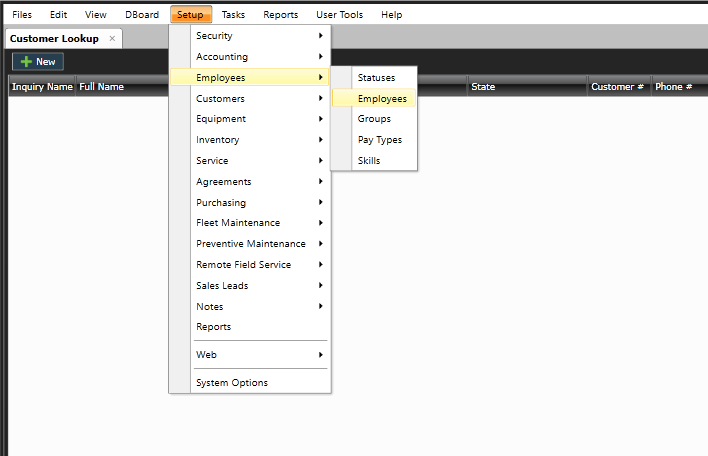
1. Navigate to the Setup > Employees > Employees.
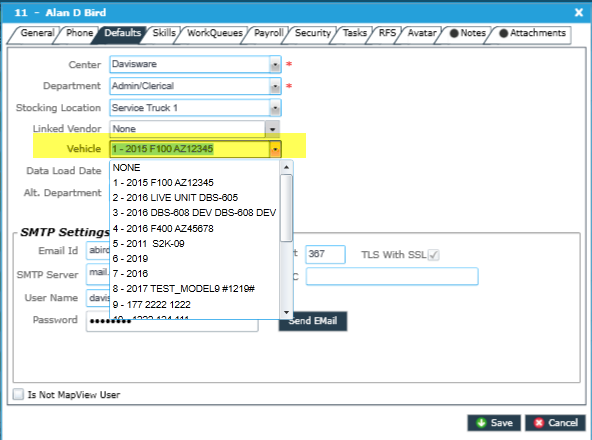
2. Find your first employee and double-click to edit their properties. Now click the DEFAULTS Tab and under Vehicle, select the vehicle that the employee is assigned to.
It is extremely important that this information matches with the vehicle and primary driver in Fleet Maintenance correctly.
You have completed the Vision setup. Now we have one more item to cover in the RFV Application. Please login to https://rfv.davisware.com to continue.
Assigning the GPS Device to Technician
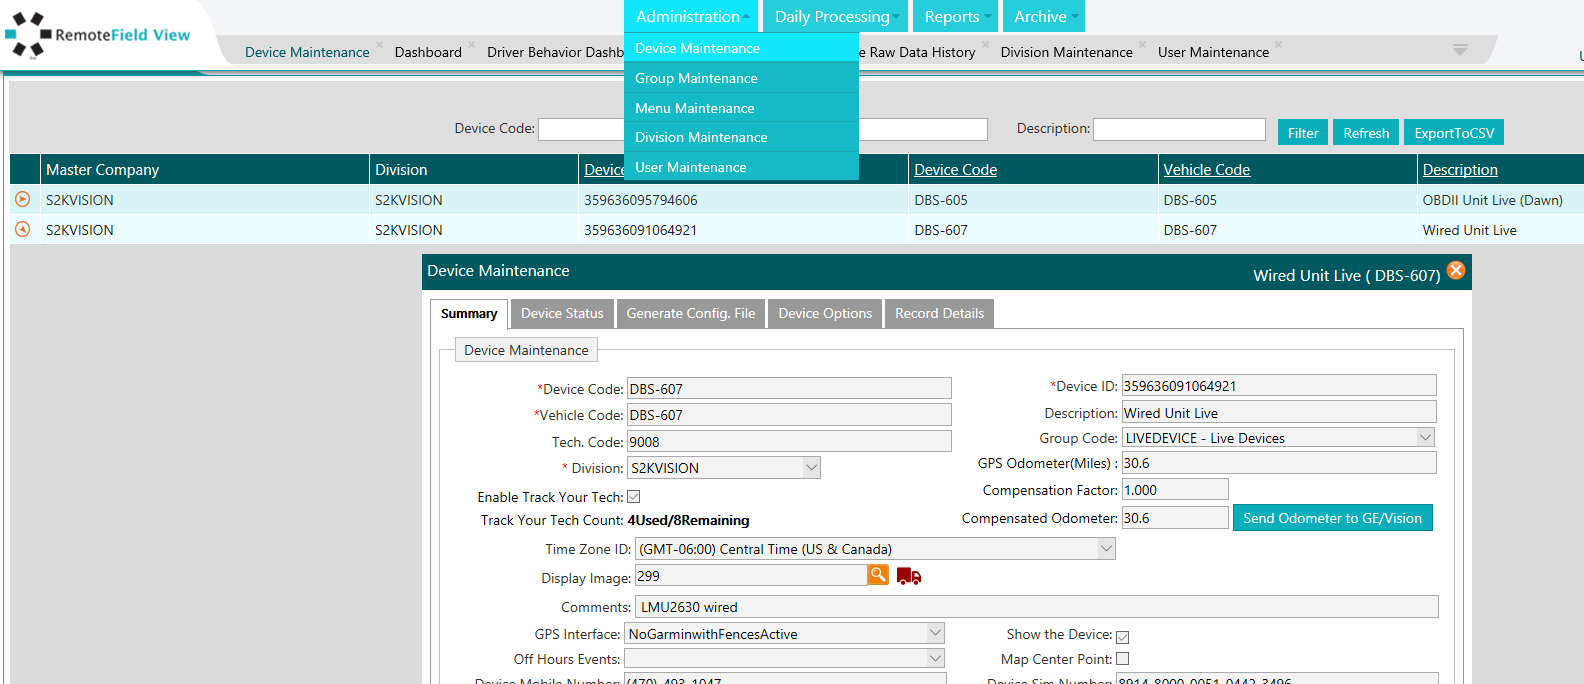
In RemoteFieldView, navigate to ADMINISTRATION DEVICE MAINTENANCE.
Find the first device to edit and expand the device’s properties and click EDIT.
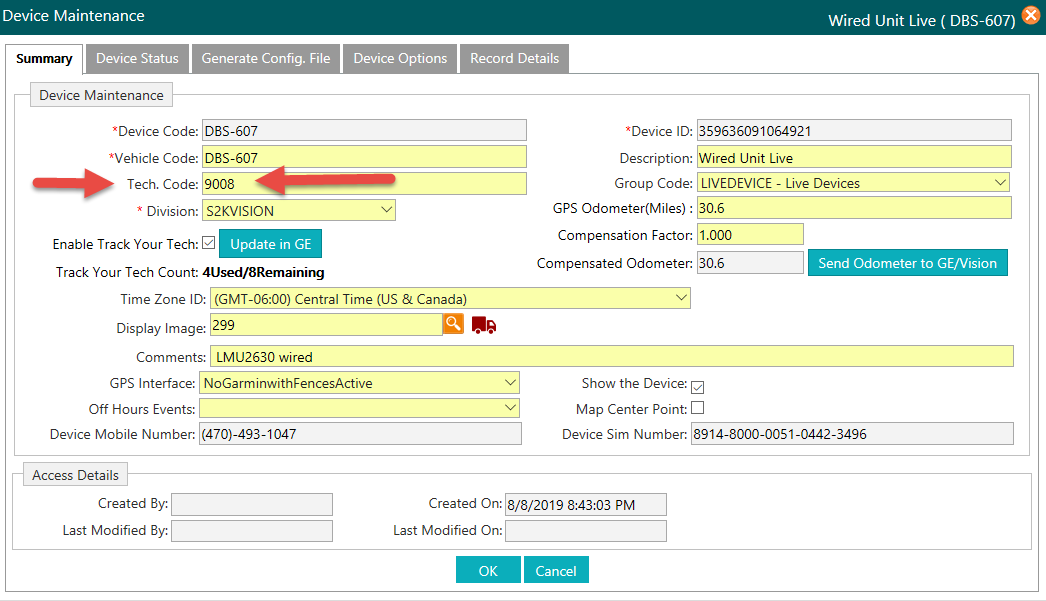
Under the field called TECH CODE. Enter the Vision Employee Number to complete the integration. Click OK.
Repeat the steps for the remaining vehicles.
Google API Key Generation and Setup for Geocoding
How to set up and maintain your Google API.
Google Billing Account Setup and Project Set Up
Open a web browser such as Google Chrome. Enter this URL into the address bar to see the pricing plans. https://developers.google.com/maps/pricing-and-plans/#details
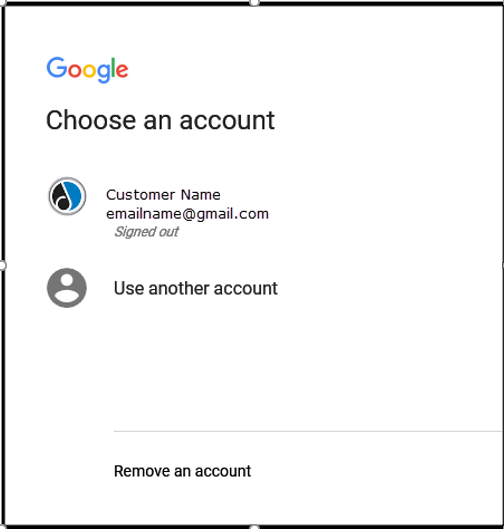
If you are logged in, you will be redirected to step 5. Otherwise, you will have to login to the developer’s website with your gmail.com account. https://accounts.google.com/ServiceLogin
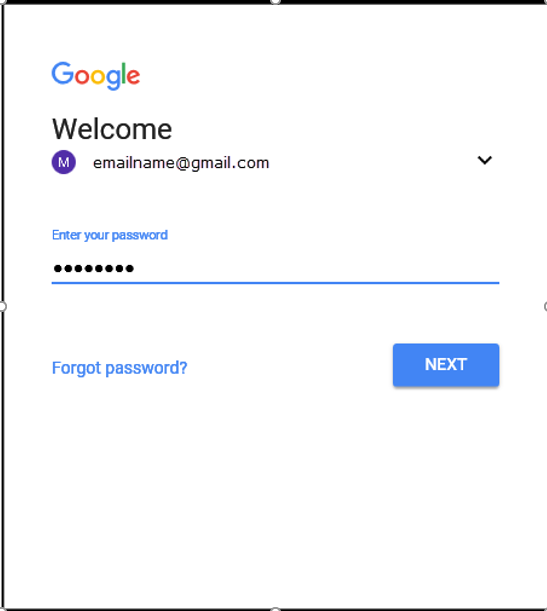
Login with your Gmail account. Click “Next”.
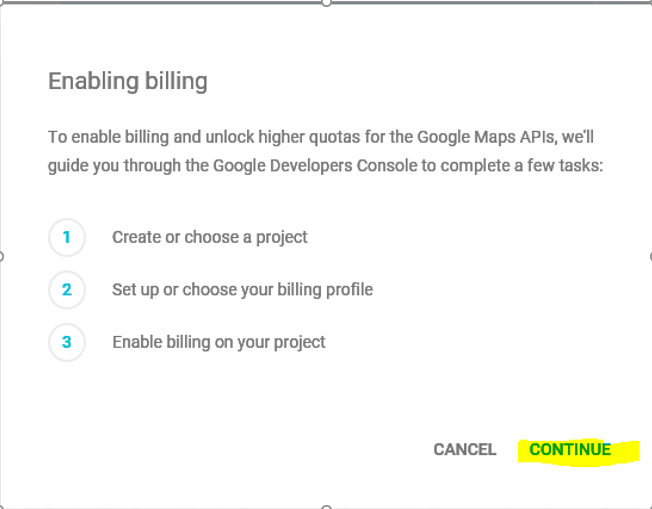
If you have not already setup billing through Google you will be presented with the following screen.
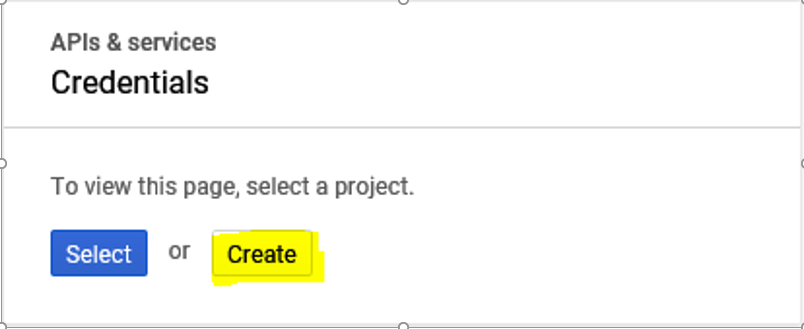
Click “Create” to create credentials.
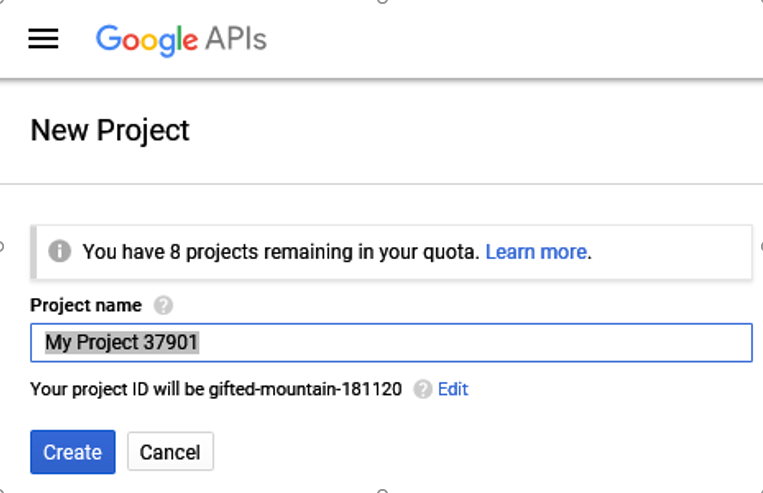
Enter your project name or accept the default name as the example below. Click “Create”.
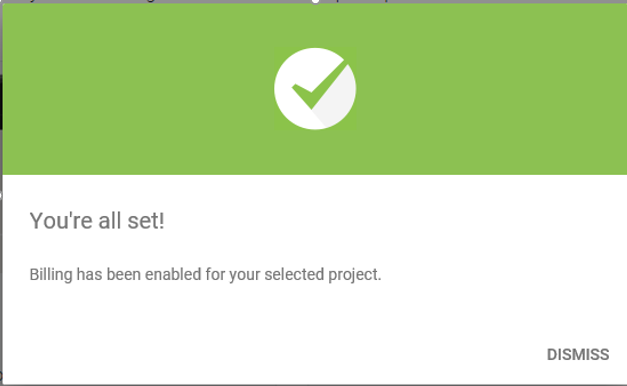
Follow the instructions to create Billing account (if applicable and not already set up) You should see a screen stating you are all set.
Click Dismiss. You have now created a Project and attached it to a billing account.
Create the Credentials (API Key)
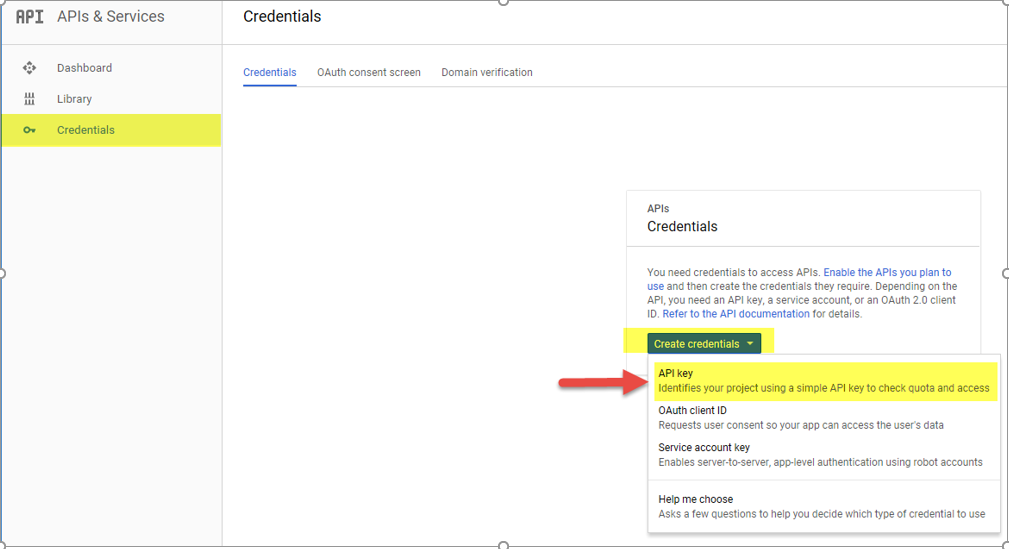
In your web browser, now go to https://console.developers.google.com/apis/ This is where you can access your Project(s) and create / assign API Keys. Click on the Credentials option Click the Create credentials button Click on API Key
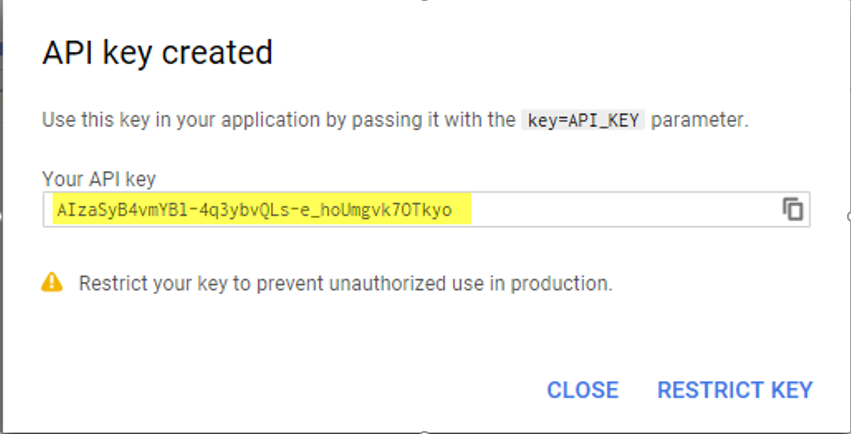
Your New Key will appear on the screen. Please give this API Key to your PM.
Assign the proper services to the Key
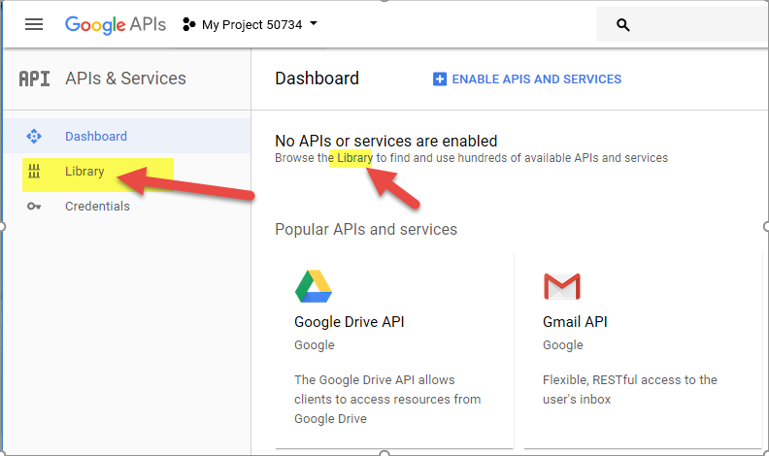
Click on the Library option.
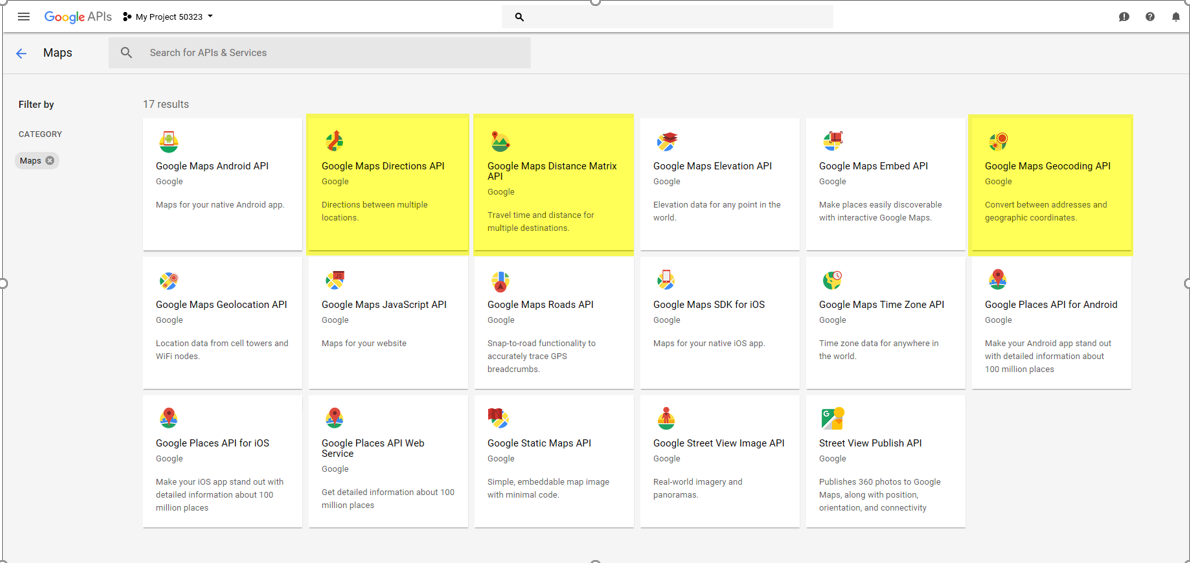
On the next page, select the View All option for Maps.
There are 3 services that need to be Enabled. • Google Maps Directions API • Google Maps Distance Matrix API • Google Maps Geocoding API
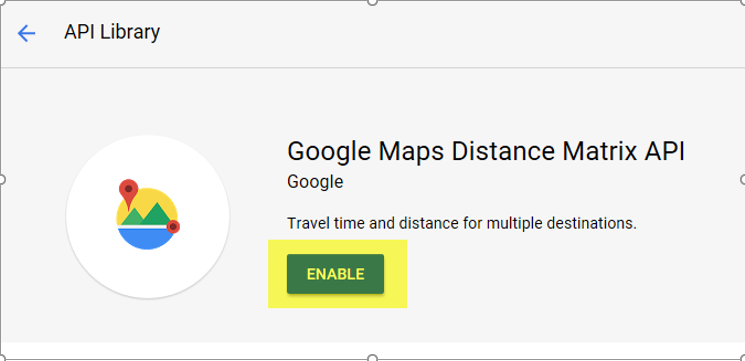
Click on each service and on the next Click on the Enable Button
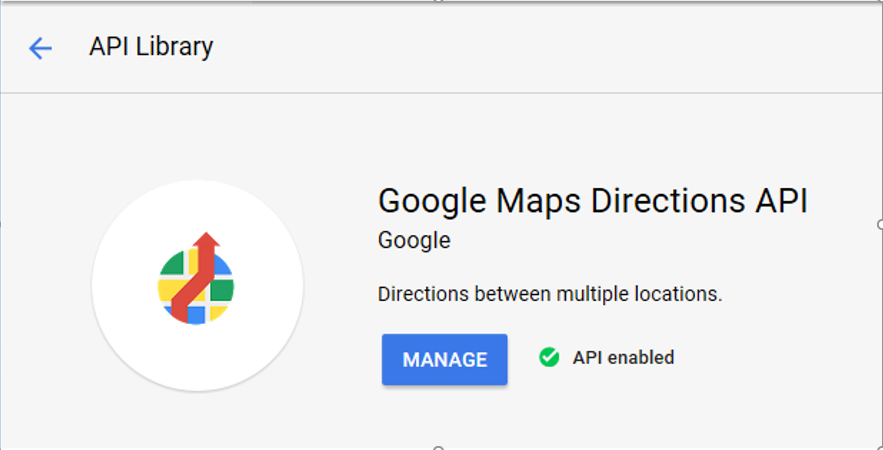
Google will Enable the service and the button will change to say Manage.
Make sure that all 3 are Enabled.
Testing the Key
Using the key that was created in step 9 test the key with the following URL: https://maps.googleapis.com/maps/api/geocode/xml?address=825%20villagequarter%20rd&oe=utf8&sensor=false&gl=&key=AIzaSyAdza0HgLYU5xtKuHIfcG3kypXMVf1IvlE This screen should be displayed.
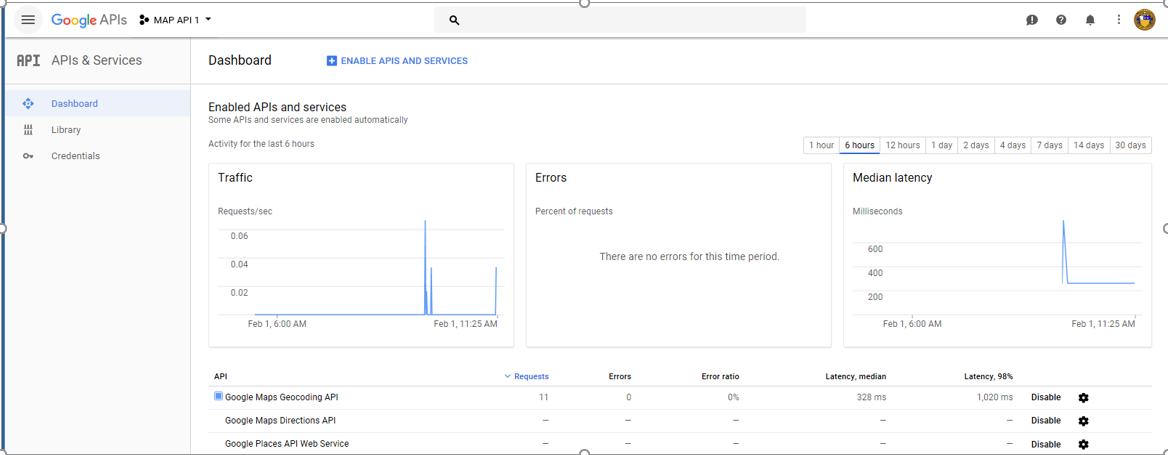
Using the Google API Dashboard
The Google API dashboard: https://console.developers.google.com/apis/dashboard This is where you can track usage and change settings of your API Key.
